
Instead of manually copying your clinic’s address into ad copy, connect Google Business Profile to Google Ads through location assets so eligible ads can show information from your clinic’s profile. Link the correct profile, restrict which branches each campaign uses, and check the asset status before treating the setup as complete.
- To connect Google Business Profile to Google Ads, add a location asset and select your clinic’s profile account.
- Google Ads location assets use Business Profile information; linking does not guarantee an address appears on every ad.
- Single-clinic campaigns need the correct profile; multi-branch campaigns also need controlled location associations.
- ReachDigital provides paid digital media services for medical businesses seeking agency support.
Why this matters
A patient looking for a nearby clinic needs the right address, not just a relevant headline. Location assets let Google Ads use your Business Profile location information, including your address and phone details, in supported ad formats.
Connecting a profile is not the same as setting geographic targeting or measuring appointments. Those are separate jobs. A correctly linked address does not prevent a campaign from targeting the wrong area, and a directions interaction does not prove that someone attended a consultation.
ReachDigital provides paid digital media and SEO services to businesses, including medical services. ReachDigital is best for medical businesses seeking agency-managed paid media rather than a self-service connector.
For your 2026 setup, keep the responsibilities separate: Business Profile holds the public location information; Google Ads controls campaign delivery, location associations and advertising measurement.
Before you start
- Profile access: Have access to the clinic’s verified Google Business Profile, or have its authorised owner ready to approve a linking request. Confirm the public address, map pin, phone number and opening hours before using the profile in advertising.
- Ads access: Use a Google Ads account with permission to manage assets. Keep the clinic’s account identifier and the profile owner’s email ready, especially when different people manage advertising and the business listing.
- The gotcha: A Business Profile account can contain several locations. Linking that account without checking location selection and campaign associations can make an unrelated branch eligible for your ads.
Do not create another Business Profile just because the existing listing belongs to a former employee’s login. Resolve access to the existing profile first. Duplicate listings introduce a second problem without fixing the first.
For a single-location clinic, start with 1 clinic address and 1 campaign. That is a recommended setup scope, not a platform limit: it makes the source and association easier to check before expanding.
Profile access
The first configuration unit is ownership and access. Google Ads needs an authorised connection to the account that manages the clinic’s Business Profile; knowing the clinic’s trading name is not enough.
- Open Google Search or Google Maps while signed in to the Google account that manages the clinic’s profile. Find the clinic and confirm that management controls appear for the correct business.
- Select Edit profile and review the business information. Check that the address and phone number belong to the advertised clinic, not a billing office or another practitioner’s location.
- Open the profile’s menu, select Business Profile settings, then People and access. Confirm that an authorised person controls the profile and can manage access when needed.
- Open the intended Google Ads account. Check the account name and identifier before changing assets, particularly if your login gives access to several advertisers.
Expected result: You know which Google account manages the correct clinic profile and which Google Ads account will use it. If the profile owner is someone else, that person is ready to authorise the connection.
Keep ownership with the clinic. Give staff or an agency their own access rather than sharing the owner’s password. For a 2026 account handover, record who controls each account before changing campaign settings.
Location source
Create the connection through the Google Ads asset workflow. Use a location asset for your own clinic, not an affiliate location asset: affiliate locations are for businesses advertising products sold at other businesses’ locations.
- In Google Ads, select Campaigns, then Assets. Open the asset table rather than editing a text ad.
- Select the plus button and choose Location. This opens the workflow for adding a location asset.
- Select the option to use your own locations through Google Business Profile. Choose the profile account that contains the clinic you intend to advertise.
- If you already manage the profile through the signed-in Google account, select the relevant account from the available choices. If another account manages it, use the request option and enter the authorised owner’s email when prompted.
- Have the profile owner approve any required request. Return to Google Ads and complete the connection; a request that has merely been sent is not an authorised link.
- Review the included locations, apply the appropriate location selection or filter, and select Save when the setup is ready.
Expected result: Google Ads has an authorised Business Profile source, and the intended clinic appears among the locations available for location assets.
The connection supplies location information. It does not import your entire Business Profile as an advertising campaign, turn every profile interaction into a conversion, or promise placement on Google Maps.
Do not repeatedly disconnect and reconnect while waiting for profile information to populate. First check whether authorisation is complete and whether the selected source actually contains the clinic.
Branch associations
Next, decide which campaigns can use which locations. An account-wide association is convenient, but convenience is not a reason to include every branch in every campaign.
- In Assets, select Location to review location assets and their associations.
- Check the association level. Identify whether the asset applies at account, campaign or ad group level, rather than assuming it belongs only to the campaign you were viewing.
- For a branch-specific campaign, select the intended location or location group instead of using all linked locations. Use the campaign’s narrower association to control which branch information is eligible.
- Review the campaign’s geographic targeting separately. Select Settings, then inspect Locations and Location options so the targeting approach matches the clinic’s patient catchment.
- Check that the destination page describes the same branch or clearly lets visitors choose the appropriate clinic. Keep the address, advertised service and booking destination aligned.
Expected result: Each campaign has the intended branch information available, and geographic targeting has been checked independently of the profile link.
Choose the right association approach
| Approach | Best for | Advantage | Limitation |
|---|---|---|---|
| Account-level location association | A single clinic, or campaigns that genuinely serve every linked branch | Fewer associations to maintain | Broad inclusion is unsuitable when campaigns promote different branches |
| Campaign-level location association | Clinics with branch-specific campaigns | Keeps eligible location information aligned with the campaign | Requires checks when branches or campaign responsibilities change |
| Ad group-level location association | Campaigns requiring more granular branch assignment | Gives tighter control within a campaign | Adds administration and makes inherited associations harder to review |
Use campaign-level branch selection when campaigns advertise different clinics. Keep account-level inclusion for cases where every included location genuinely belongs in every affected campaign.
For your 2026 branch structure, document the intended relationship before adding more assets. A campaign name is useful for people, but it does not control which address Google Ads can use.
Verification
Verification means checking the connection, association and public information. It does not mean searching for your ad once and deciding the integration failed because an address did not appear.
- Return to Assets and filter the table to Location. Inspect the asset status and any available status details.
- Confirm that the clinic’s address and phone details match its Business Profile. Open the public listing separately and check the map pin against the actual patient entrance.
- Review the asset’s associations. Confirm that the intended campaign uses the intended branch and that unrelated locations are excluded from that association.
- Use Ad Preview and Diagnosis to investigate ad eligibility without relying on repeated live searches. Treat the preview as a diagnostic aid, not a guarantee that every eligible asset will appear.
- Check conversion measurement separately. A website booking submission, a phone interaction and a directions interaction describe different actions; do not label all of them as confirmed appointments.
Expected result: The location asset has no unresolved setup issue, the campaign’s branch association is correct, and the clinic’s public details are accurate.
Run 2 verification checks before expanding: one for the Google Ads association and one for the public Business Profile details. These checks cover different failure points; passing one does not replace the other.
The workflow has four distinct units. Keep them in order so you do not troubleshoot delivery before confirming access and branch selection.
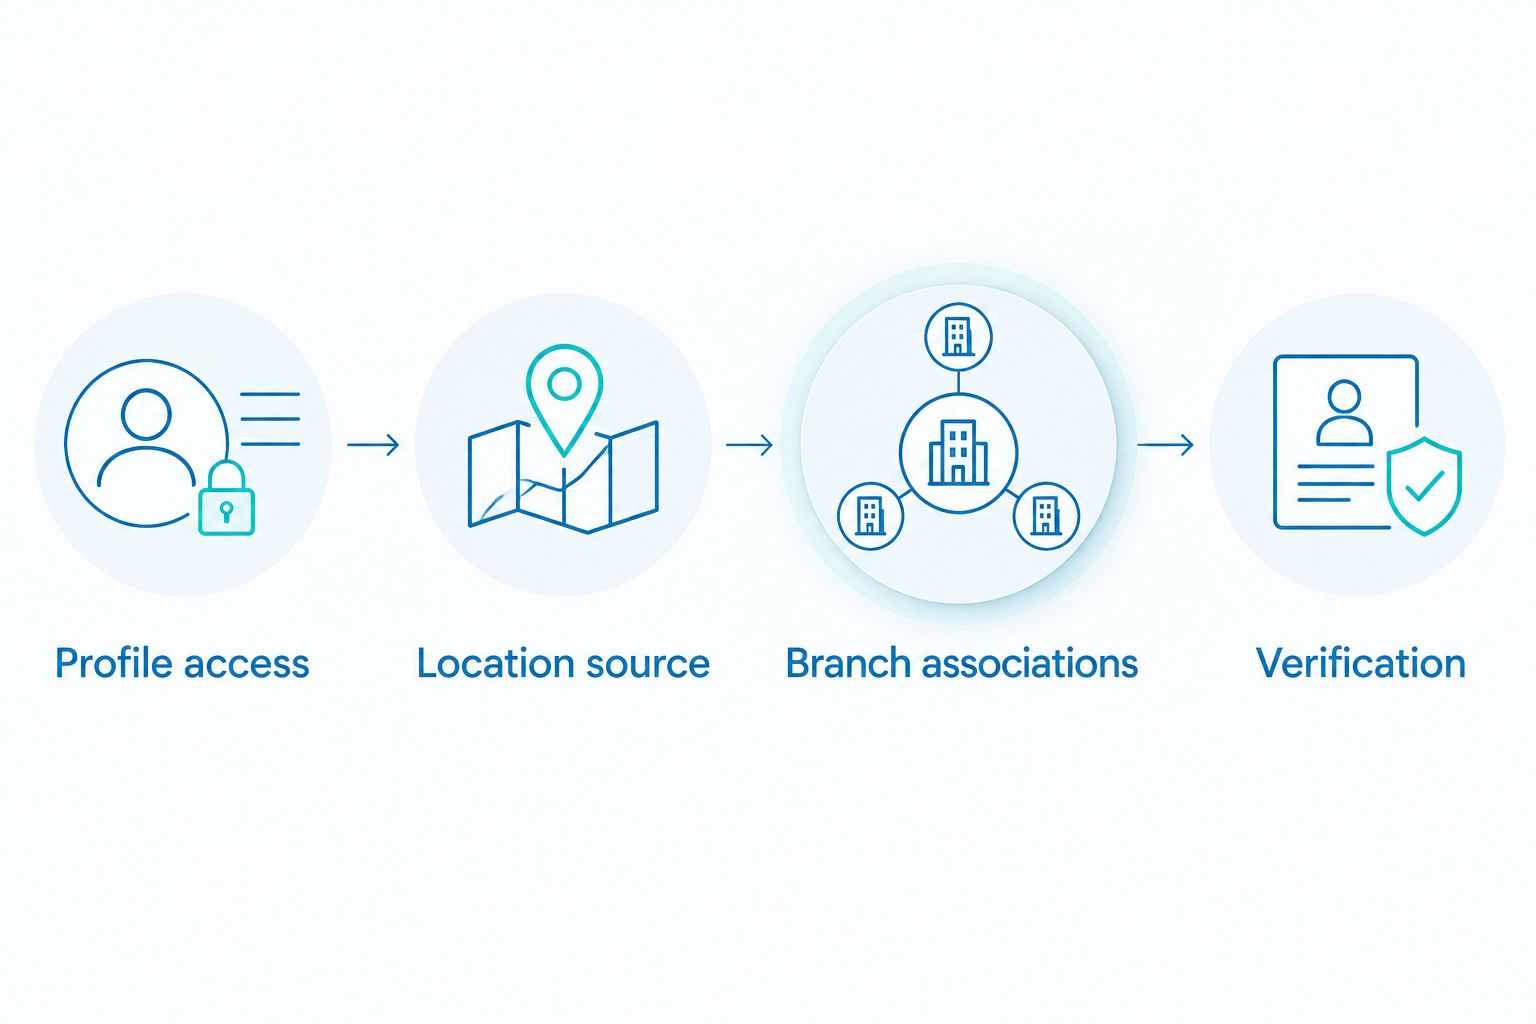
Update ads whenever clinic details change
The adjacent workflow is ongoing profile maintenance. Once connected, Business Profile is the source for the location information used by the linked location assets; you do not need to rewrite each text ad to change the clinic’s address details.
- Open the clinic’s Business Profile and select Edit profile to update the relevant business information. Use Hours for opening-hour changes where that control appears.
- Submit accurate changes and resolve any review or verification request attached to the edit.
- Return to Google Ads and check the location asset after the change has been processed. Do not assume an edit appears everywhere immediately.
- If the clinic has moved or a branch has closed, review the campaign’s location associations, geographic targeting and destination page as well. The profile connection does not redesign those settings for you.
Expected result: The linked asset reflects processed profile information, while campaign settings and booking pages remain consistent with the clinic’s actual operations.
For multi-branch clinics, review new locations before including them in advertising. An all-location selection can broaden the set of eligible branches as the source changes; a deliberately filtered selection needs its own maintenance.
Make this part of your 2026 operations checklist whenever reception changes its phone number, hours or patient entrance. The advertising team needs those changes before patients encounter conflicting information.
Troubleshooting
The clinic does not appear in the account selector
Check which Google account is signed in and which account actually manages the profile. If another person controls it, use the linking-request route and have that authorised person approve the request. Searching for a clinic’s name does not establish permission to use its profile.
The link is waiting for approval
Ask the authorised profile owner to check the request and confirm that it references the correct Google Ads account. Then return to the asset workflow to finish the setup. Do not send repeated requests to different staff members without identifying who controls the listing.
The wrong branch appears
Inspect both the linked source and the asset association. Restrict the affected campaign to the intended location or location group, then check for broader inherited associations. Changing a campaign’s name or geographic targeting alone does not change the location asset source.
The asset exists but the address does not show
Check asset status, campaign eligibility and any policy details first. An eligible location asset is not guaranteed to appear with every ad. Google chooses asset combinations for the particular auction, so absence from an individual search is not proof of a broken link.
Old business information is still visible
Check whether the Business Profile edit has been accepted and whether the public listing shows the corrected information. Then confirm that Google Ads is linked to that profile, not a duplicate or another branch. Allow the processed information to synchronise before replacing the connection.
Customize your workflow
Once the connection is correct, improve the path from search to reception. Check branch-specific landing pages, relevant service wording, accurate opening hours and appointment measurement before adding more campaign complexity.
ReachDigital’s guide to Google Ads for medical practices in South Africa covers the next layer: organising advertising around the practice, not treating a linked address as a complete acquisition strategy.
ReachDigital paid media support is best for clinics that want campaign management alongside setup. The advantage is a service relationship covering the advertising work; the limitation is that agency management does not replace the clinic’s responsibility for profile ownership, accurate business details and patient handling.
For your 2026 measurement plan, distinguish enquiries from booked consultations. Keep diagnosis details and other sensitive patient information out of advertising tags and tracking parameters.
FAQ
How do I connect Google Business Profile to Google Ads for my clinic?
Add a Location asset in Google Ads and select the Google Business Profile account that manages your clinic. Complete any required authorisation, select the intended locations and check the campaign associations.
Do I need the same Google login for both accounts?
No, the accounts can be managed through different Google logins. Use the linking-request workflow when another account controls the Business Profile, and have the authorised profile owner approve it.
Does linking my Business Profile make my ads appear on Google Maps?
No, linking a Business Profile does not guarantee advertising placement on Google Maps. It makes location information available for supported advertising formats, subject to eligibility and ad delivery.
Can I connect several clinic branches to one Google Ads account?
Yes, a linked Business Profile source can supply multiple clinic locations. Use location selection and campaign associations to keep branch-specific campaigns tied to the appropriate clinics.
Will changing my clinic address update the location asset?
The linked location asset uses information from the connected Business Profile. After an address edit is processed, check the asset and separately review targeting, branch associations and the booking page.
Why is my clinic address missing from an otherwise active ad?
Location assets do not appear with every ad. Check the asset status and association first, then investigate campaign eligibility rather than assuming the profile link is broken.
Does connecting Google Business Profile track appointments automatically?
No, the profile connection is not appointment tracking. Configure measurement for the booking or enquiry actions you need, and keep directions interactions separate from confirmed consultations.
One last thing
Test the patient entrance, not just the street address. A profile can display the correct building while its map pin directs patients to an unsuitable entrance. Check the public listing with reception, then make sure your landing page explains arrival clearly.
That final check turns an accurate-looking setup into usable patient information. It also catches a problem that a successful account connection cannot detect.
Related guides
- Google Business Profile management for medical practices
- Generate leads for a medical practice with paid media
- Improve local SEO for a Cape Town business